
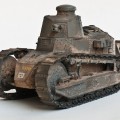
When Armycast M&M released their SAV (Stormartillerivagn) m/43 as a full resin kit, my first thought was at the time “wow, finally a Swedish WW2 era vehicle that can be built straight out of the box!”..
Well, close, but not quite. Here’s the story…
Why “Part 1”?
I have chosen to divide this article into two parts, the reason being that I built this model in 2009 and since then I have made the decision to repaint it and put it in a different setting. I will tell you more about this further down in this article..
Modifying Armycast M&M’s model:
Very quickly after purchasing the resin kit, I decided on two major modifications. The first one involved correcting the length of the hull. The M&M kit is too short (SI hull), so it needed to be corrected to the longer SII hull configuation. The second “modification”, slightly more involved, was to scratchbuild an interior. The vehicle with its boxy fighting compartment really screams for an interior, so I really could not resist attempting to scratch build one.
Extending the hull:
I discovered quite early in the build that the resin lower hull parts are actually copies of Tristar’s Panzer 38(t), with some minor modifications for the SAV. As such, I actually decided to use Tristars parts in many areas, simply out of preference for working in plastic rather than resin (the resin parts are very nice, I would like to add, so this choice was personal preference only). The side and bottom panels were lengthened 2mm with strips of plastic card just in front of the rear bogey. The lengthening of the vehicle also involved extending the engine deck covers by the same 2mm.
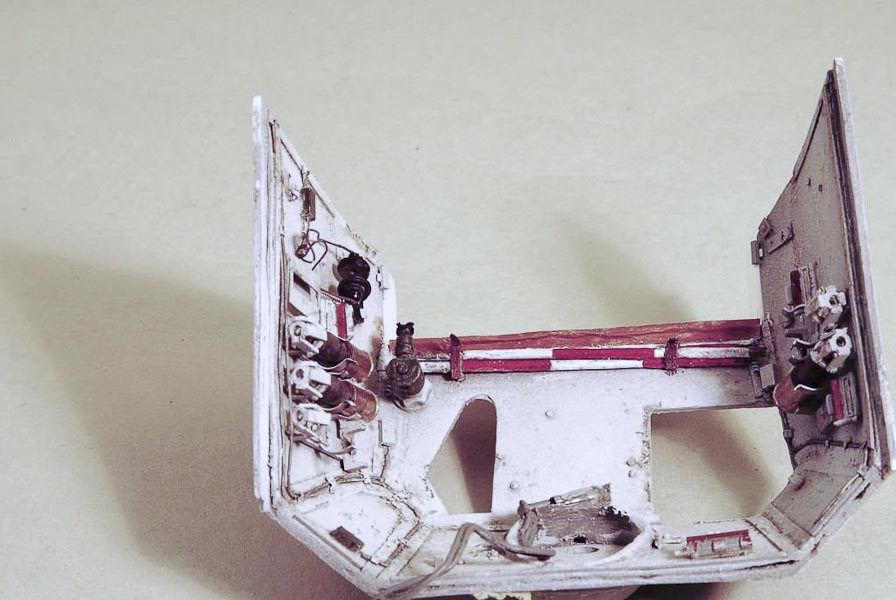
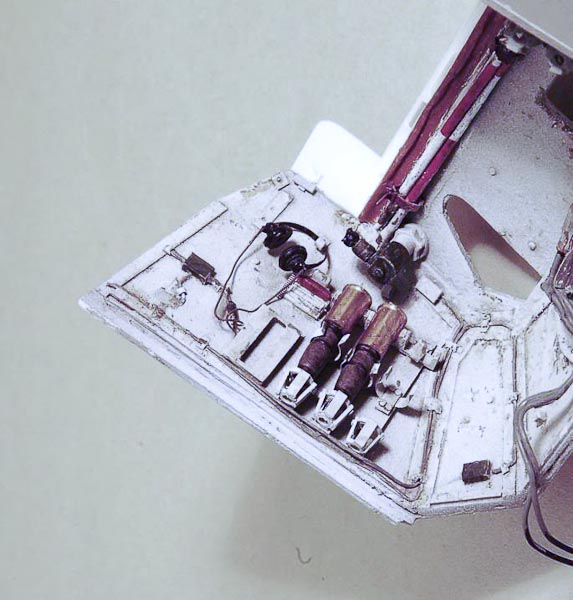
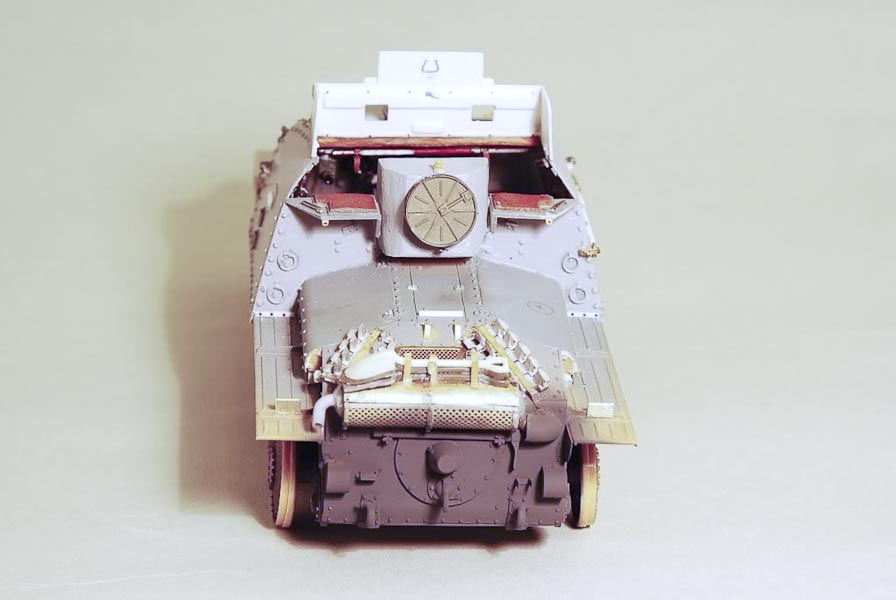
Building the Interior:
An interior was added into the empty lower hull, for which I used a few parts from the Tristar Panzer 38(t) interior set (transmission, driver’s controls and seat), and scratch built the rest with plastic card, rod and various bits of brass.
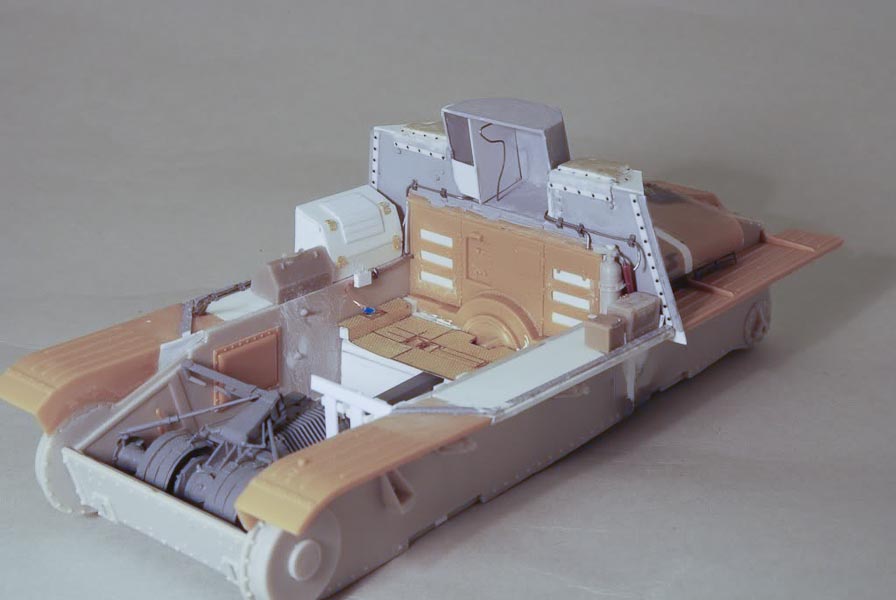

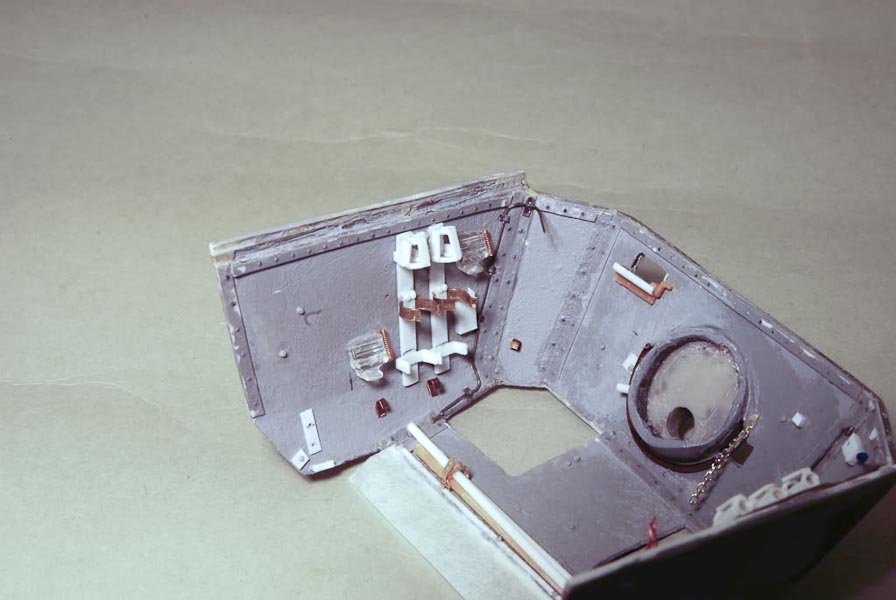
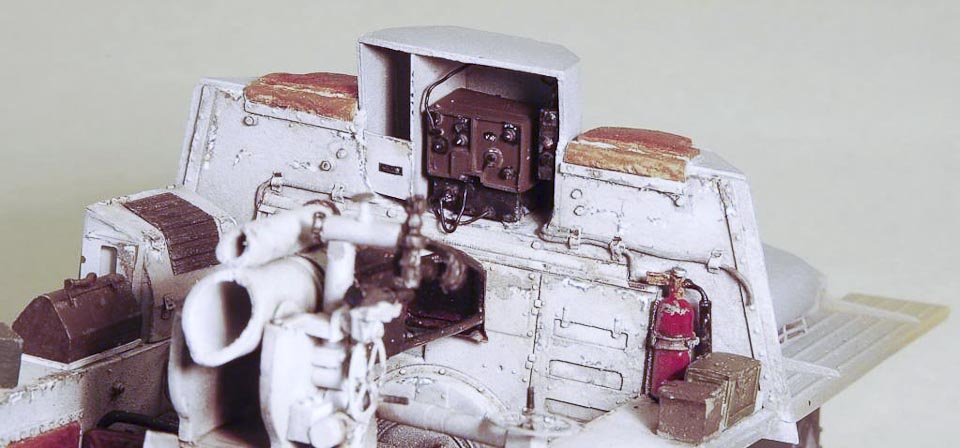
The fighting compartment is a rather thick resin molding, with all the hatches in the closed position. Since I was adding this interior, I wanted to open this entire part up. This was a very time-consuming job of machining away a lot of resin on the inside, making openings for all the hatches and then dressing up the interior walls with scratch built parts. The rear bulkhead had to be reproduced in plastic card, because I needed the radio compartment to be an open shelf and not a solid resin block. If I was to build this vehicle again, I would choose to scratch-build the entire fighting compartment in plastic, in hindsight that would have been much easier than reworking the resin part.
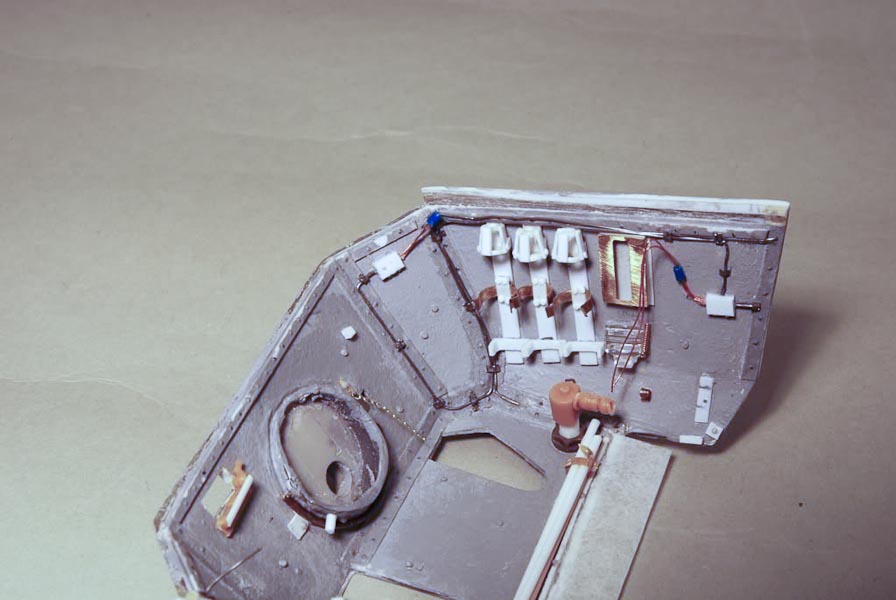
Painting the interior:
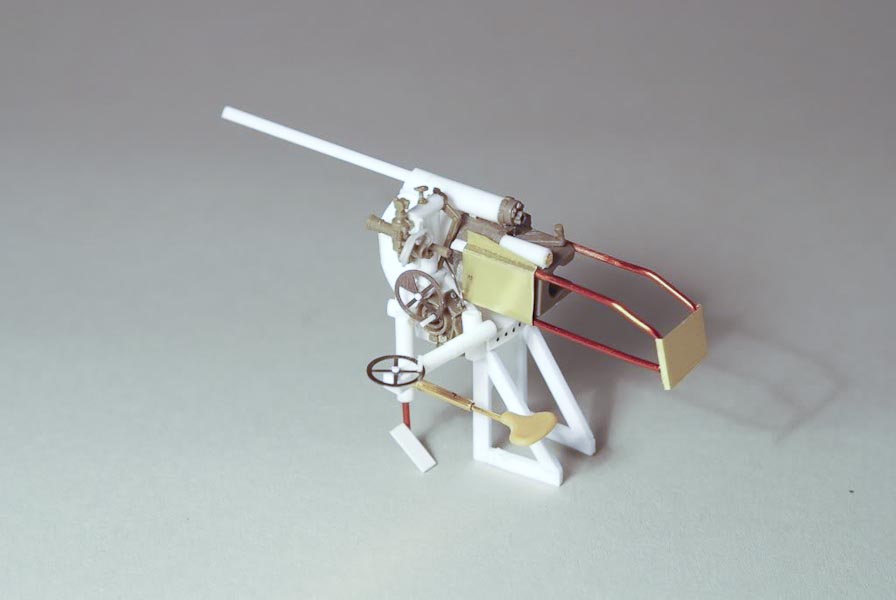
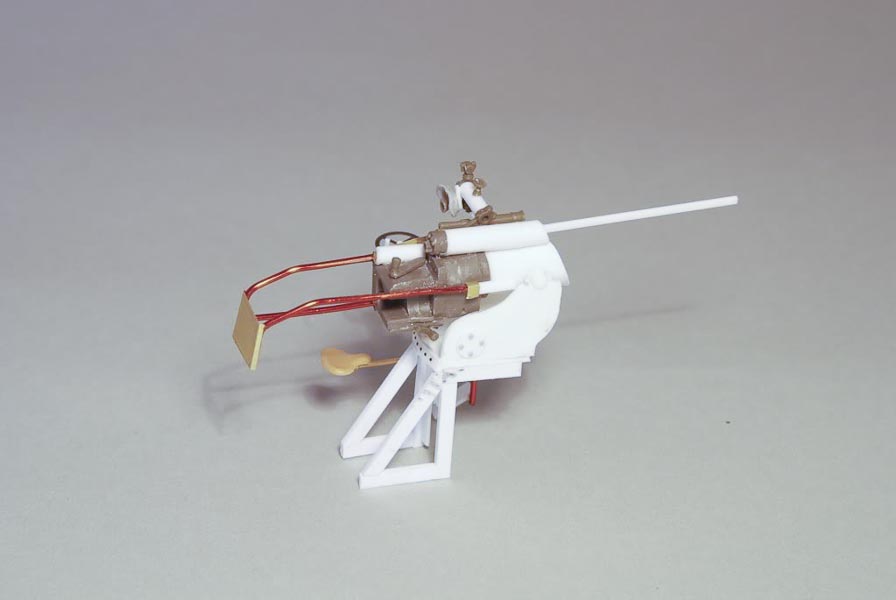
Before closing the vehicle down, all the interior had to be assembled and painted. An overall coat of Tamiya dark grey followed by white was airbrushed. Detail painting, chipping, oil stains and general weathering was picked out with a brush. The Swedish radio was scratch built and painted at this stage as well.
Not much more to say about this, so I’ll just show the pics 

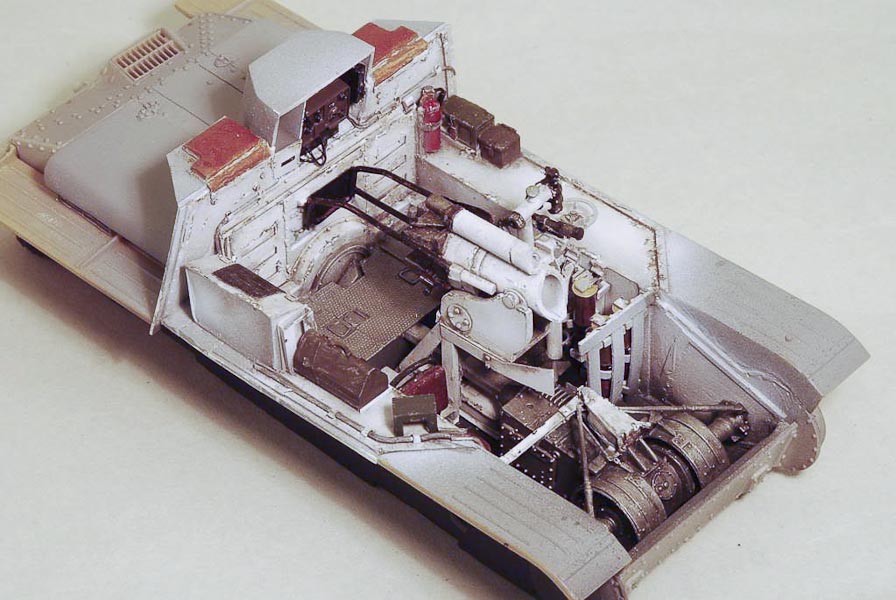
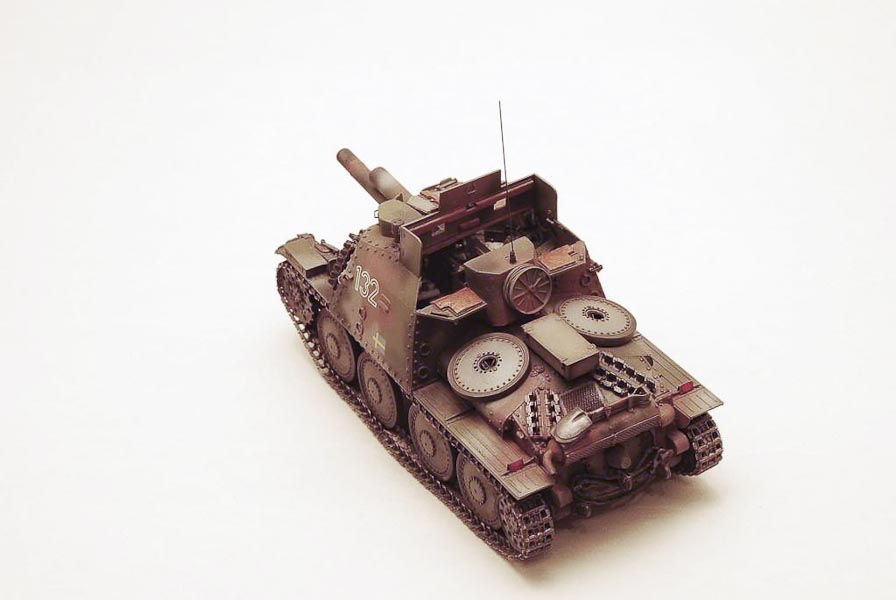
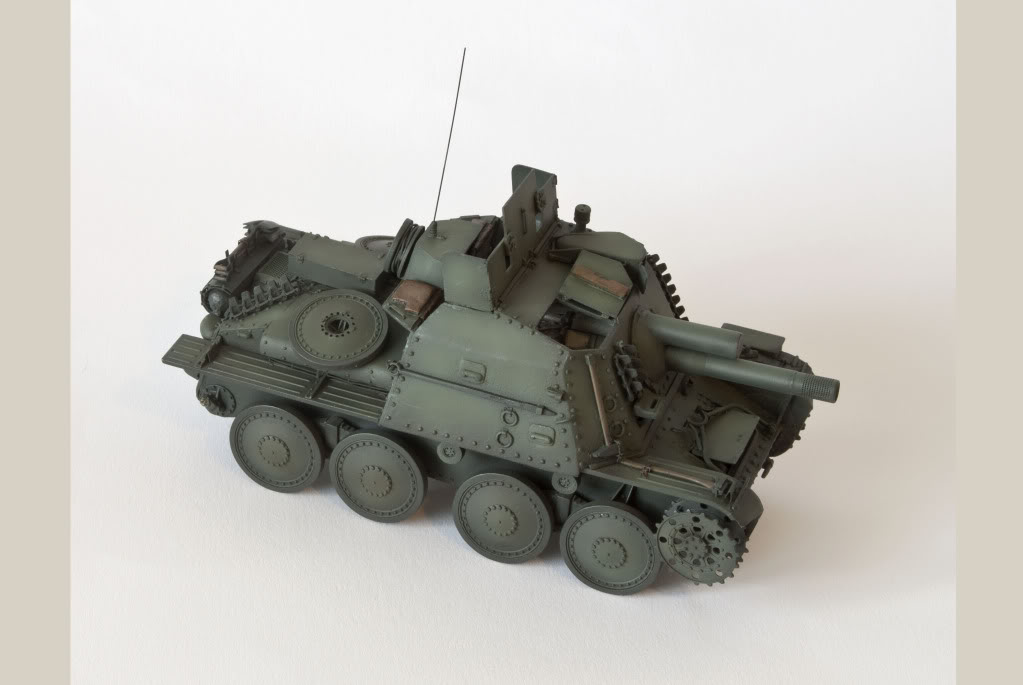
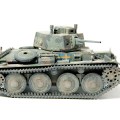
The exterior:
The exterior of the vehicle is extensively converted, not only to depict all the open hatches, but also to match the vehicle configuration according to my reference material. Tool placement, exhaust cover and many other details were therefor altered and scratchbuilt to match. One very tedious aspect of the project was that I had removed all the rivets from the resin fighting compartment to enable me to make all the modifications, and now all these had to be replaced – one by one, not much fun :-). All the open hatches were scratchbuilt with plastic card and etched brass hinges (the resin molded-on hatches had basically disintegrated in the process of opening everything up)
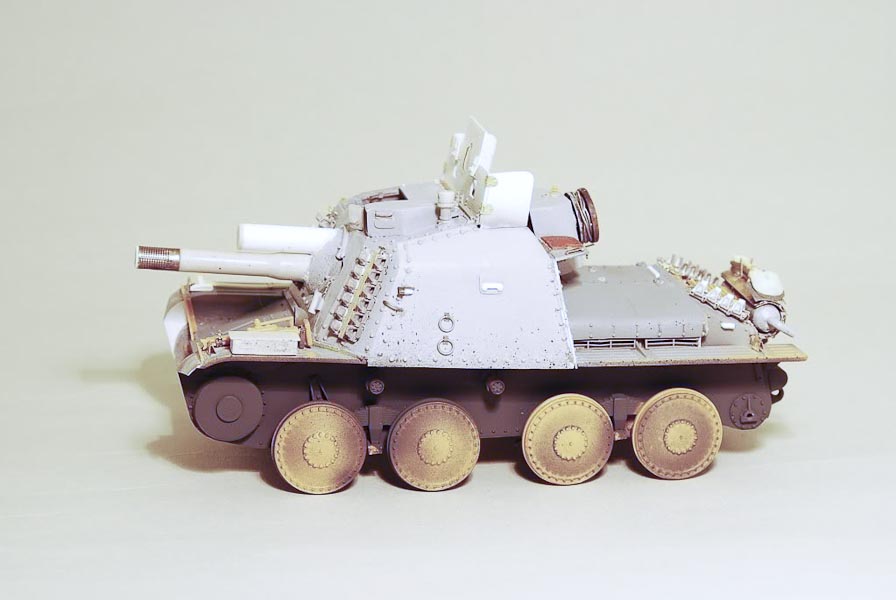

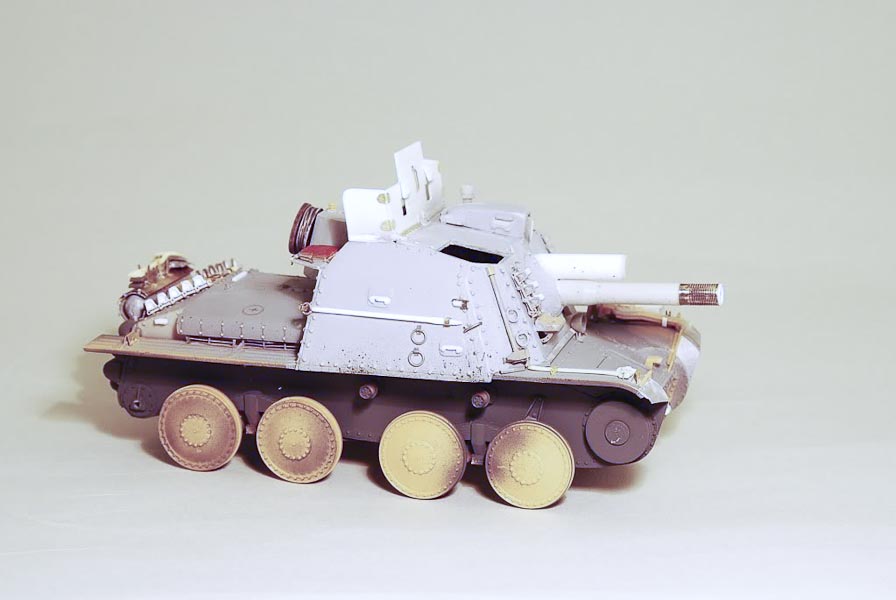
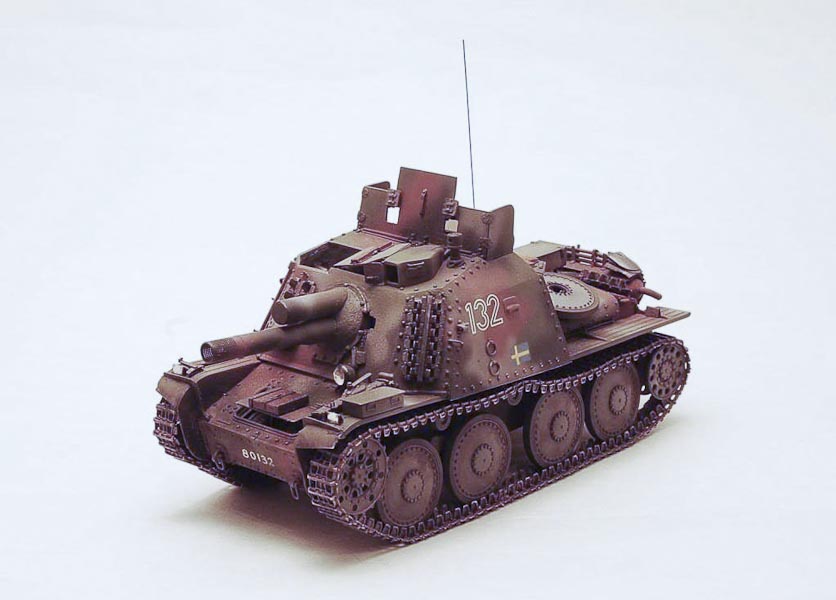
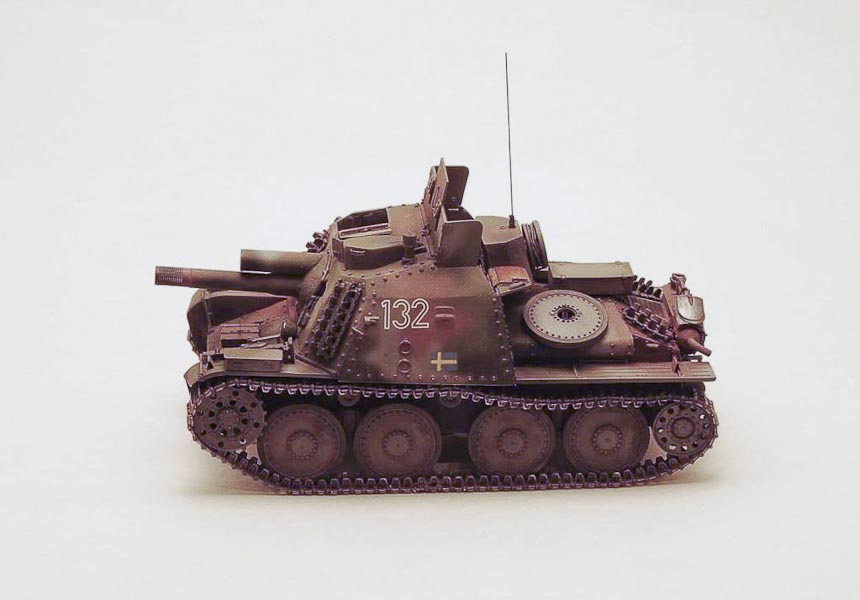
Painting the exterior:
I chose to paint the vehicle in the war time pattern of four colours (Tamiya acrylics): grey, green, earth and black. The cammo pattern was airbrushed free hand, and all details painted with a brush with Vallejo acrylics. The leather areas on the inside of the hatches were painted with oils.
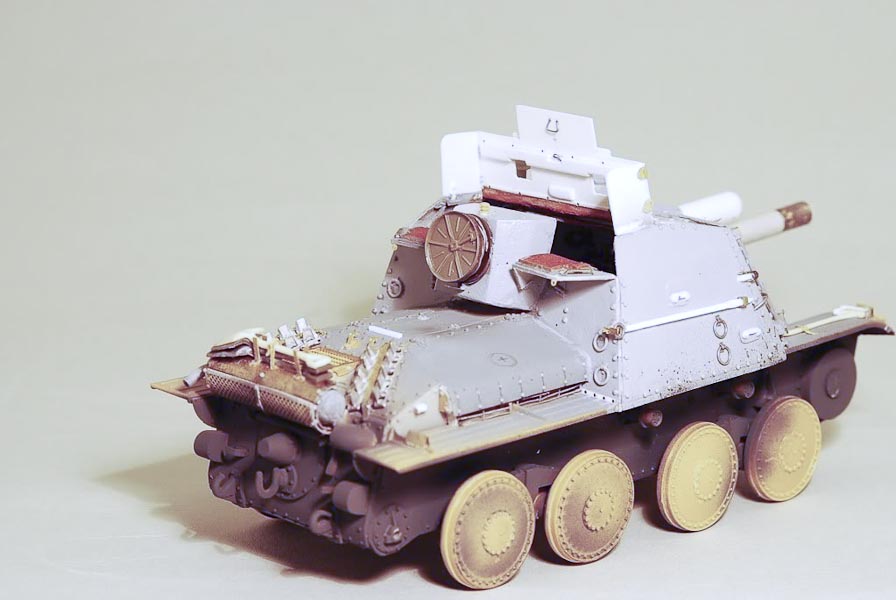
Markings:
The large white digits on the side of the vehicle were taken from an Archer transfer set, as were the yellow registration digits. They don’t quite match the Swedish “font”, but were as close as I could get at the time – (the Swedish decal set with lettering and markings had not been released in 2009). The Swedish flag was masked and painted on using my airbrush.

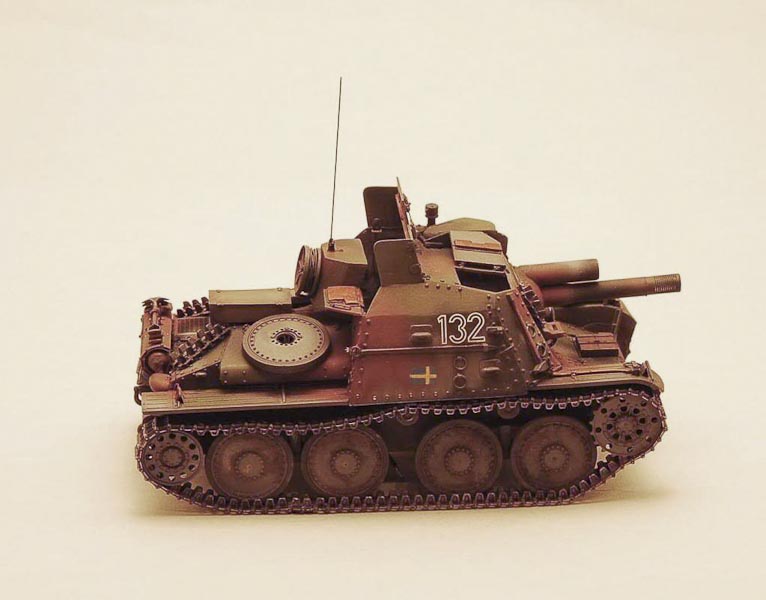

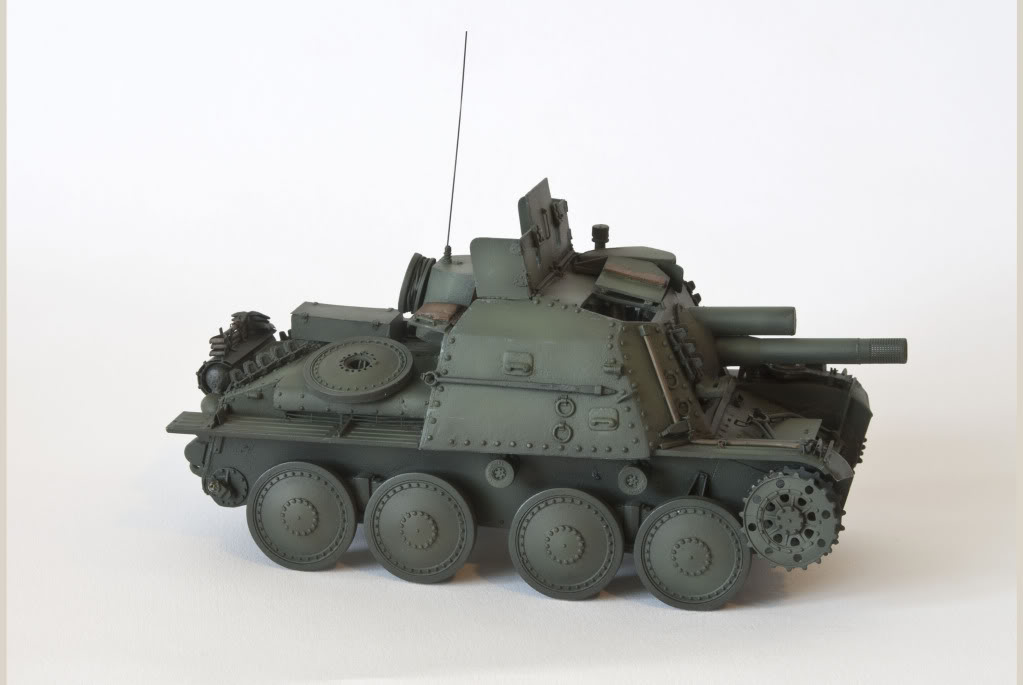
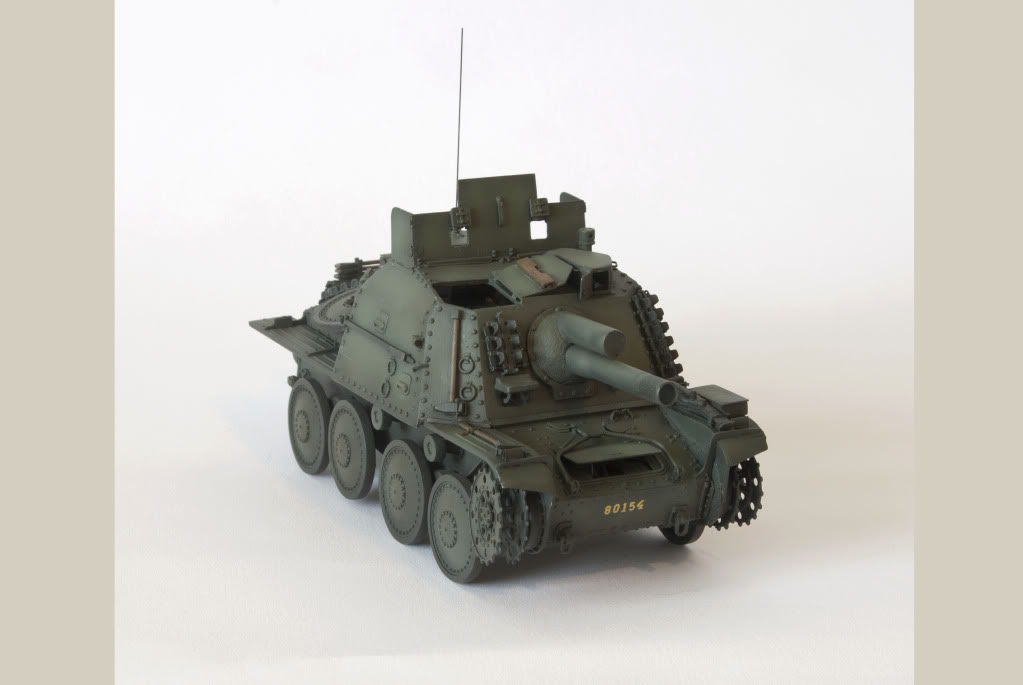
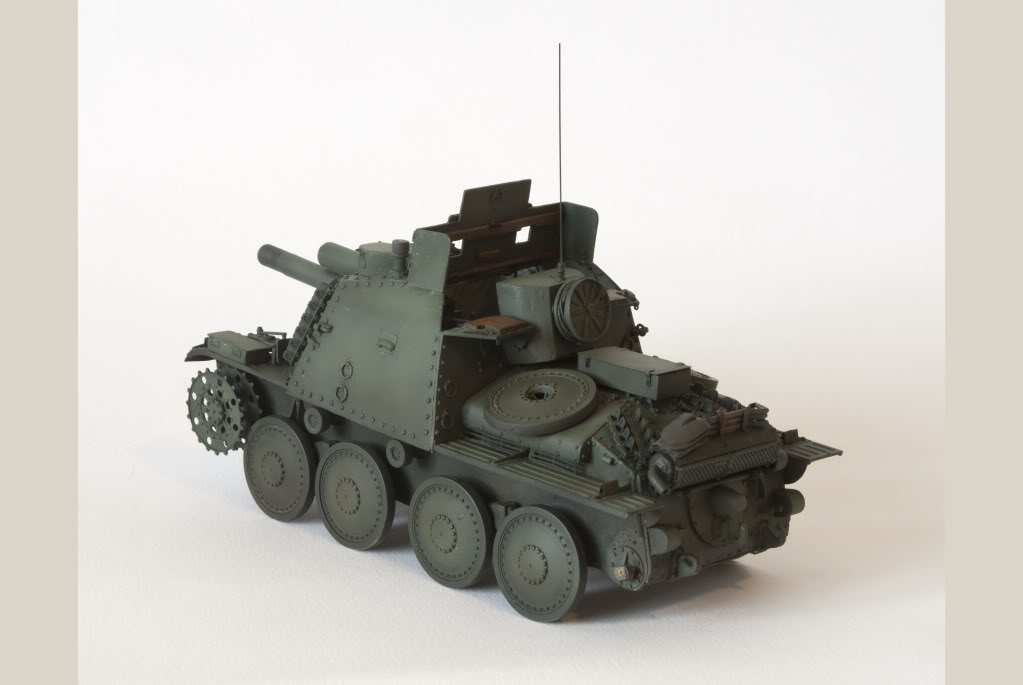
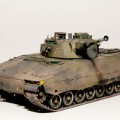
Conclusion and preview of part 2:
As I mentioned earlier, this model was completed per the above description in 2009, in time for the C4-Open modeling competion in Malmö that same year. After that, it stood on a shelf at home for a while until I started to have second thoughts about it.
One thing I had never been happy with was that I felt that the paint job was a little rushed, and the second thing that bugged me was that I had actually built a post-war configuration of this vehicle which was actually more suited to be in all Olive Green and not four colour cammo.
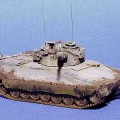
So, in 2011, the corrective work started. My intention is to include the vehicle in a new vignette when it is completed.
Here’s a preview of the progress so far, more in part 2 of this article..
I know, the overall green paint scheme is not as interesting as the cammo pattern, but it is more historically correct and with some shading and highlighting I am convinced that even monotone green can look ok
Thanks for your interest, and see you soon again soon on Plastic Warfare !
My thanks to Erik G for enhancing my 2009 pics in Photoshop to make them more presentable!

I’m searching for technical diagrams to help me build some models of two Swedish tanks. The Stridsvagn m/42 and the Stormartillerivagn m/43.
Could you offer any advice on where I might be able to acquire these? I would gladly buy any book that contained such diagrams.
Hello Jan!
Great to hear that you wish to build Swedish armour.
SPHF (Swedish armour historical society) has a large range of scale drawings for sale, including the SAV and strv m/42. I will send you some contact details to you e-mail.
The SPHF website: http://www.sphf.se , unfortunately only in Swedish, but you will find lots of great info there (should work to translate with a web translator).
Cheers,
Sven
Thank you for your help Sven. When I saw how many drawings they have for sale, I ordered a few others too.
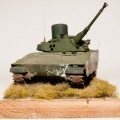
My models are all 1/55 scale, and as they are made for wargaming, they are not nearly as beautifully made as yours. Since no one makes the Swedish tanks in this scale, I’ve decided to try and build them myself.
No problem, Jan, happy to help!
I am glad you were able to order a lot of drawings, they are very helpful.
Thanks for your kind comments about my builds, I am glad you like them.
Your work is impressive and you have a very nice website/blog.
Thanks.
My models are most being made with resin casting in mind, and I am learning as I go along. So far, my first two attempts at making a mold, have failed.
Can I ask you a technical question? How do you make your rivets? I use Evergreen 0.5mm styrene tube cut like a sausage and added with a dab of polystyrene cement, but its a cumbersome and often messy approach.
Hello Jan,
For the SAV, I purchased resin rivets in various sizes since I needed them to have that rounded, domed shape. There are also plastic rivets available, I see that Meng is releasing some interesting sheets with rivets and bolts.
For flat bolts and rivets, I use a punch and die, since I am completely incapable of slicing rod to an even, flat shape. Of course, punch and dies are no use for domed rivets since it can only produce flat shapes.
Cheers,
Sven